VPC
Create VPC
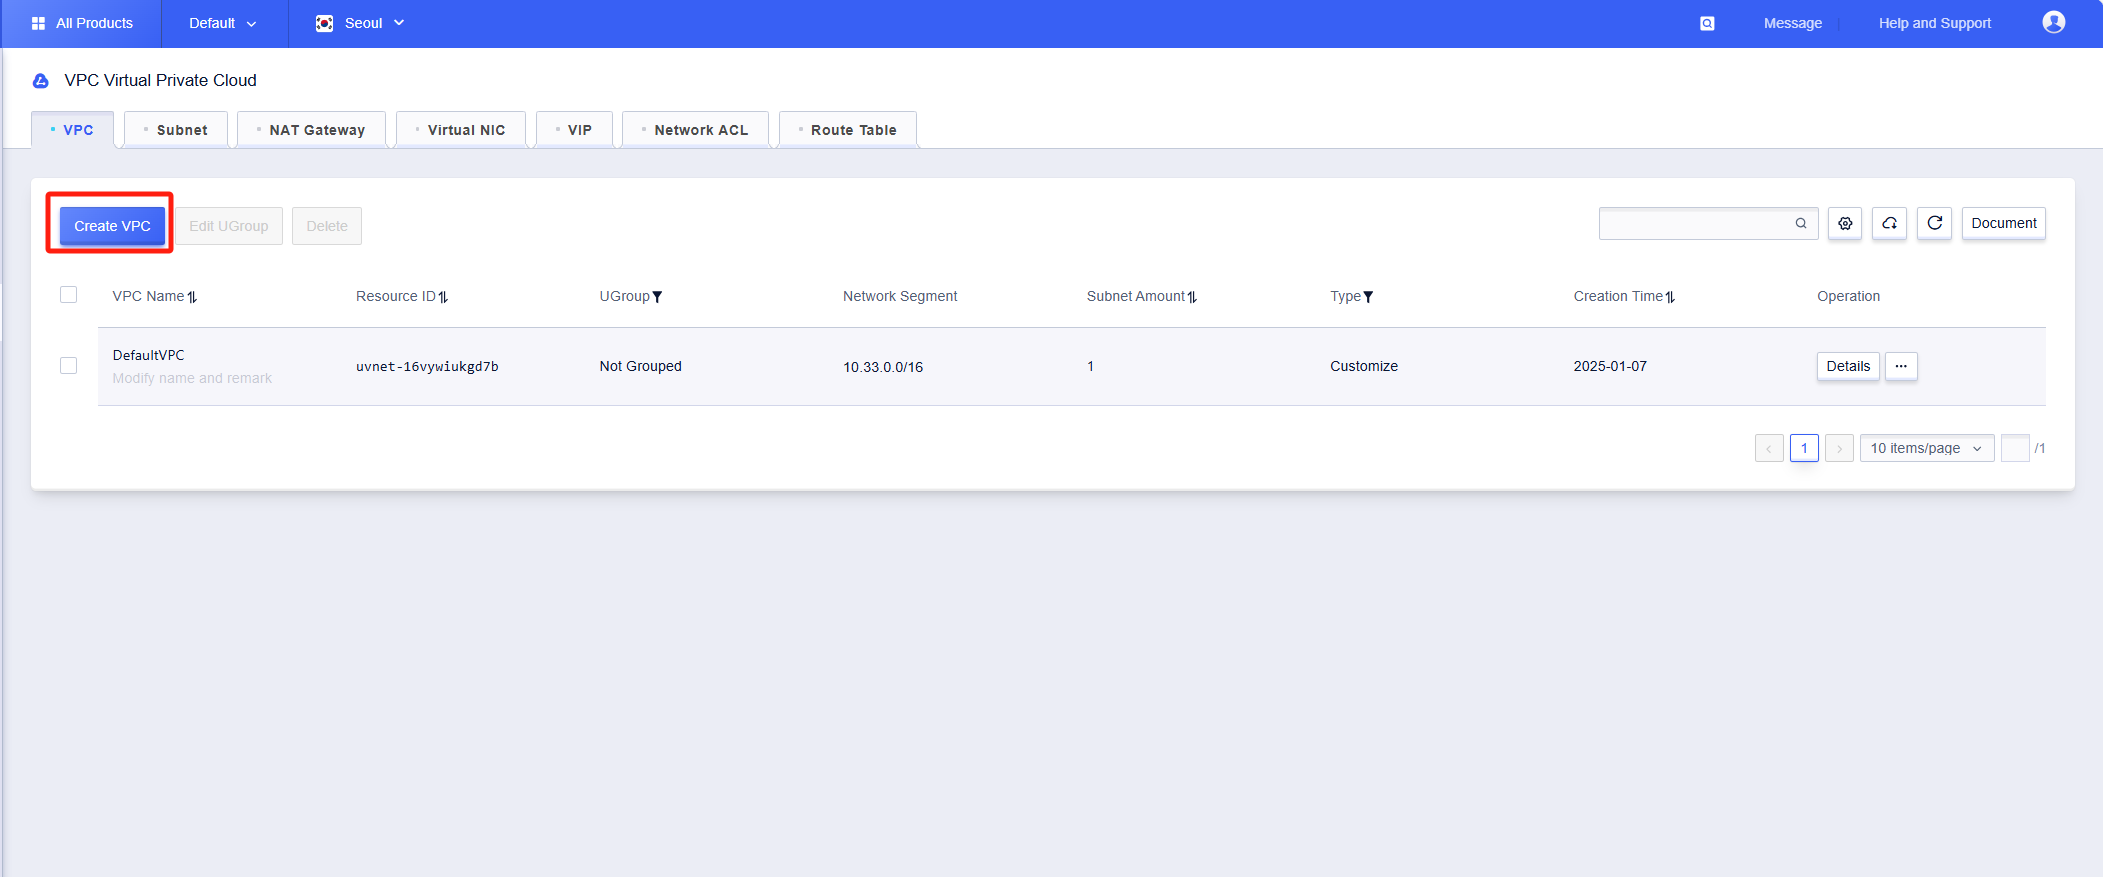
Select “Private Network VPC” in “Products & Services”, go to the private network page, click the “Create VPC” button in the “VPC” tab to create it.
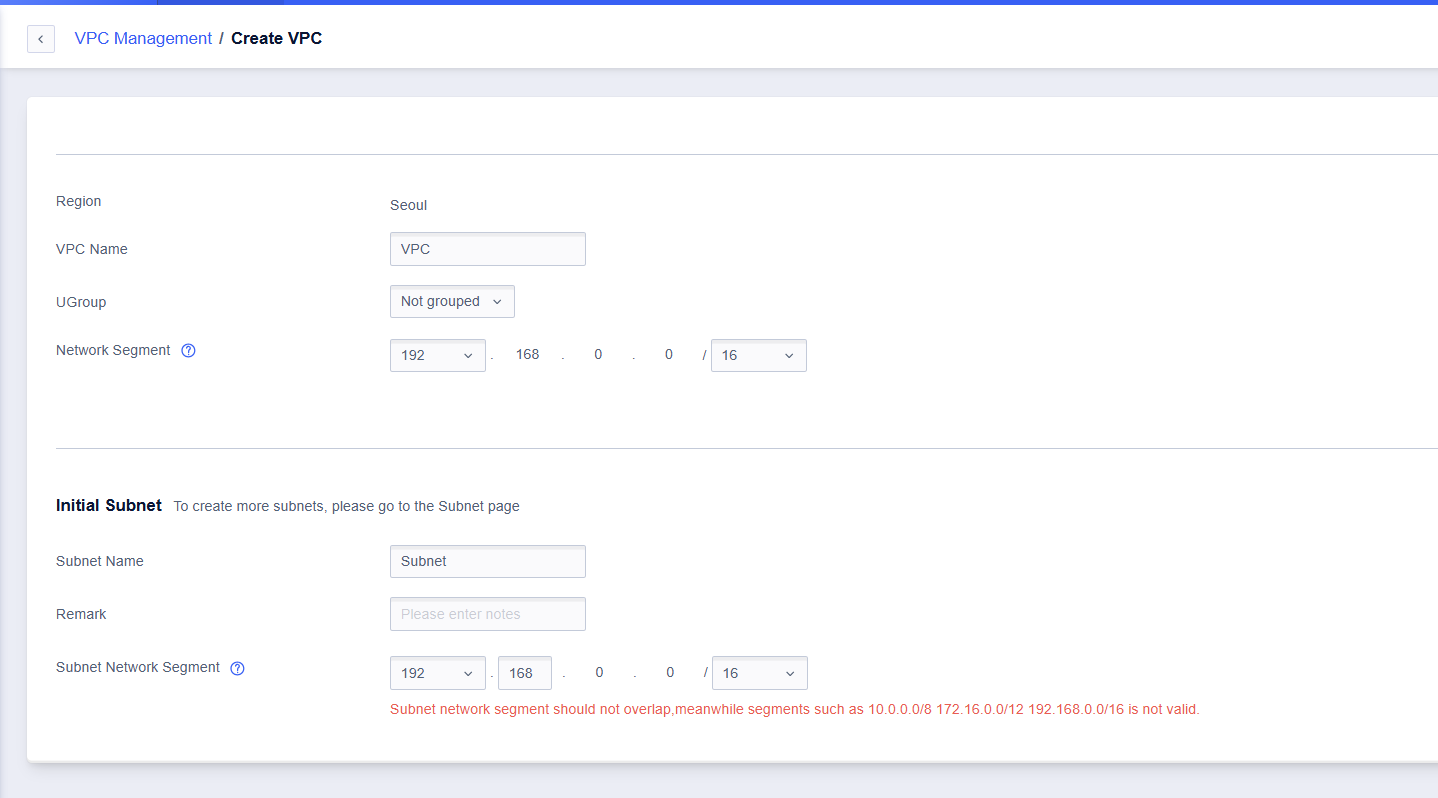
Fill in the VPC name on the pop-up page, select the network segment you need, and the default is 192.168.0.0/16. Then click “OK”.
Many independent address segments can exist within a VPC, as long as there is no overlapping of addresses.
In the creation VPC pop-up dialog box, select the ”+” sign under “Network Segment”, and you can add another network segment.
After successful creation, you can view the created VPC in the VPC list of the VPC tab.
Add Network Segment
After the VPC is created, multiple overlapping network segments can be added at any time.
Click the “Add Network Segment” button in the “VPC” tab.
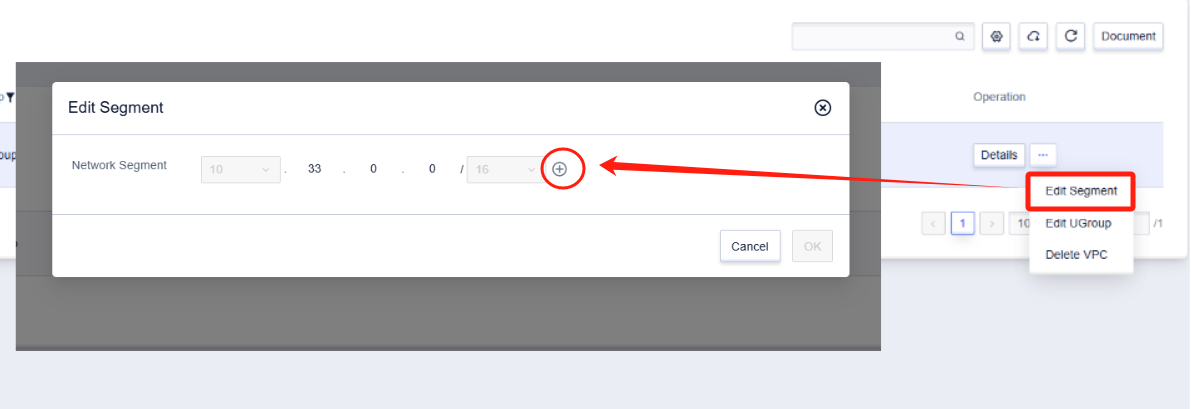
In the pop-up dialog box, fill in the network segment information to be added.
Click “OK”, success added.
View VPC Details
Click the “Details” button in the “VPC” tab to enter the details page of a VPC.
On the details page, you can see basic information of the VPC such as the VPC name, resource id, remark, business group, subnet number, and network segment.
Network Interconnection
The two VPCs were originally isolated from each other. If two VPC networks need to be accessible to each other for business purposes, this can be achieved through the “Network Interconnection” function of the VPC.
Click the “Network Interconnection” button in the “VPC” tab to enter the “Network Interconnection” operation page, or switch to the “Network Interconnection” tab in the VPC details page.
Click the “Connect VPC” button on the page to enter the “Connect VPC” dialog box.
Select the VPC to be connected, and ensure that there is no overlap in network segments between the VPCs, and click “OK”.
Confirm the VPC information to be connected again and click “OK”.
Successfully connected. If the address segments of the VPCs attempting to be connected overlap, the network interconnection will fail and an error will be reported.
The connected VPC will be displayed in the “Connected VPC” list.
Cross-Project VPC Interconnection
In addition to connecting different VPCs in the same project, “Network Interconnection” also allows VPCs between different projects to be connected.
As mentioned above, enter the “Network Interconnection” operation page and click the “Connect VPC” button on the page to enter the “Connect VPC” dialog box.
Click the drop-down list next to “Respective Projects” and select the target project.
In the VPC list of the target project, select the VPC to be connected, and click “OK” to confirm and complete the connection.
Disconnect Interconnection
For the VPCs that have already been connected, you can choose to disconnect.
In the “Connected VPC” list, choose the VPC you want to disconnect. The “Disconnect VPC” button changes from unavailable to available, click the button.
In the popped-up “Disconnect VPC” dialog box, click “OK” to confirm the disconnection.
Successfully disconnected. The connection information in the “Connected VPC” list will be updated accordingly.
Delete VPC
In the VPC list, select the VPC to be deleted and click the “Delete” button.
Before deleting the VPC, make sure that the cloud resources and subnets in the VPC have been deleted, and it is not interconnected with other VPCs, otherwise it cannot be deleted.
In the popped-up “Delete VPC” dialog box, click “OK” to confirm the deletion.