Network ACL
A network ACL is a subnet-level security policy used to control the data flow in and out of the subnet. Users can precisely control the traffic flow into and out of the subnet by setting outbound rules and inbound rules.
Create ACL
- Log in to the console, select “VPC Virtual Private Cloud” in [All Products], and go to the private network page. You can create an ACL instance by clicking the “Create ACL” button in the Network ACL tab.

- Select the associated VPC of the ACL, enter the ACL name, and click “OK”.

- After creation, you can see the newly created ACL instance in the list.

Edit inbound rules
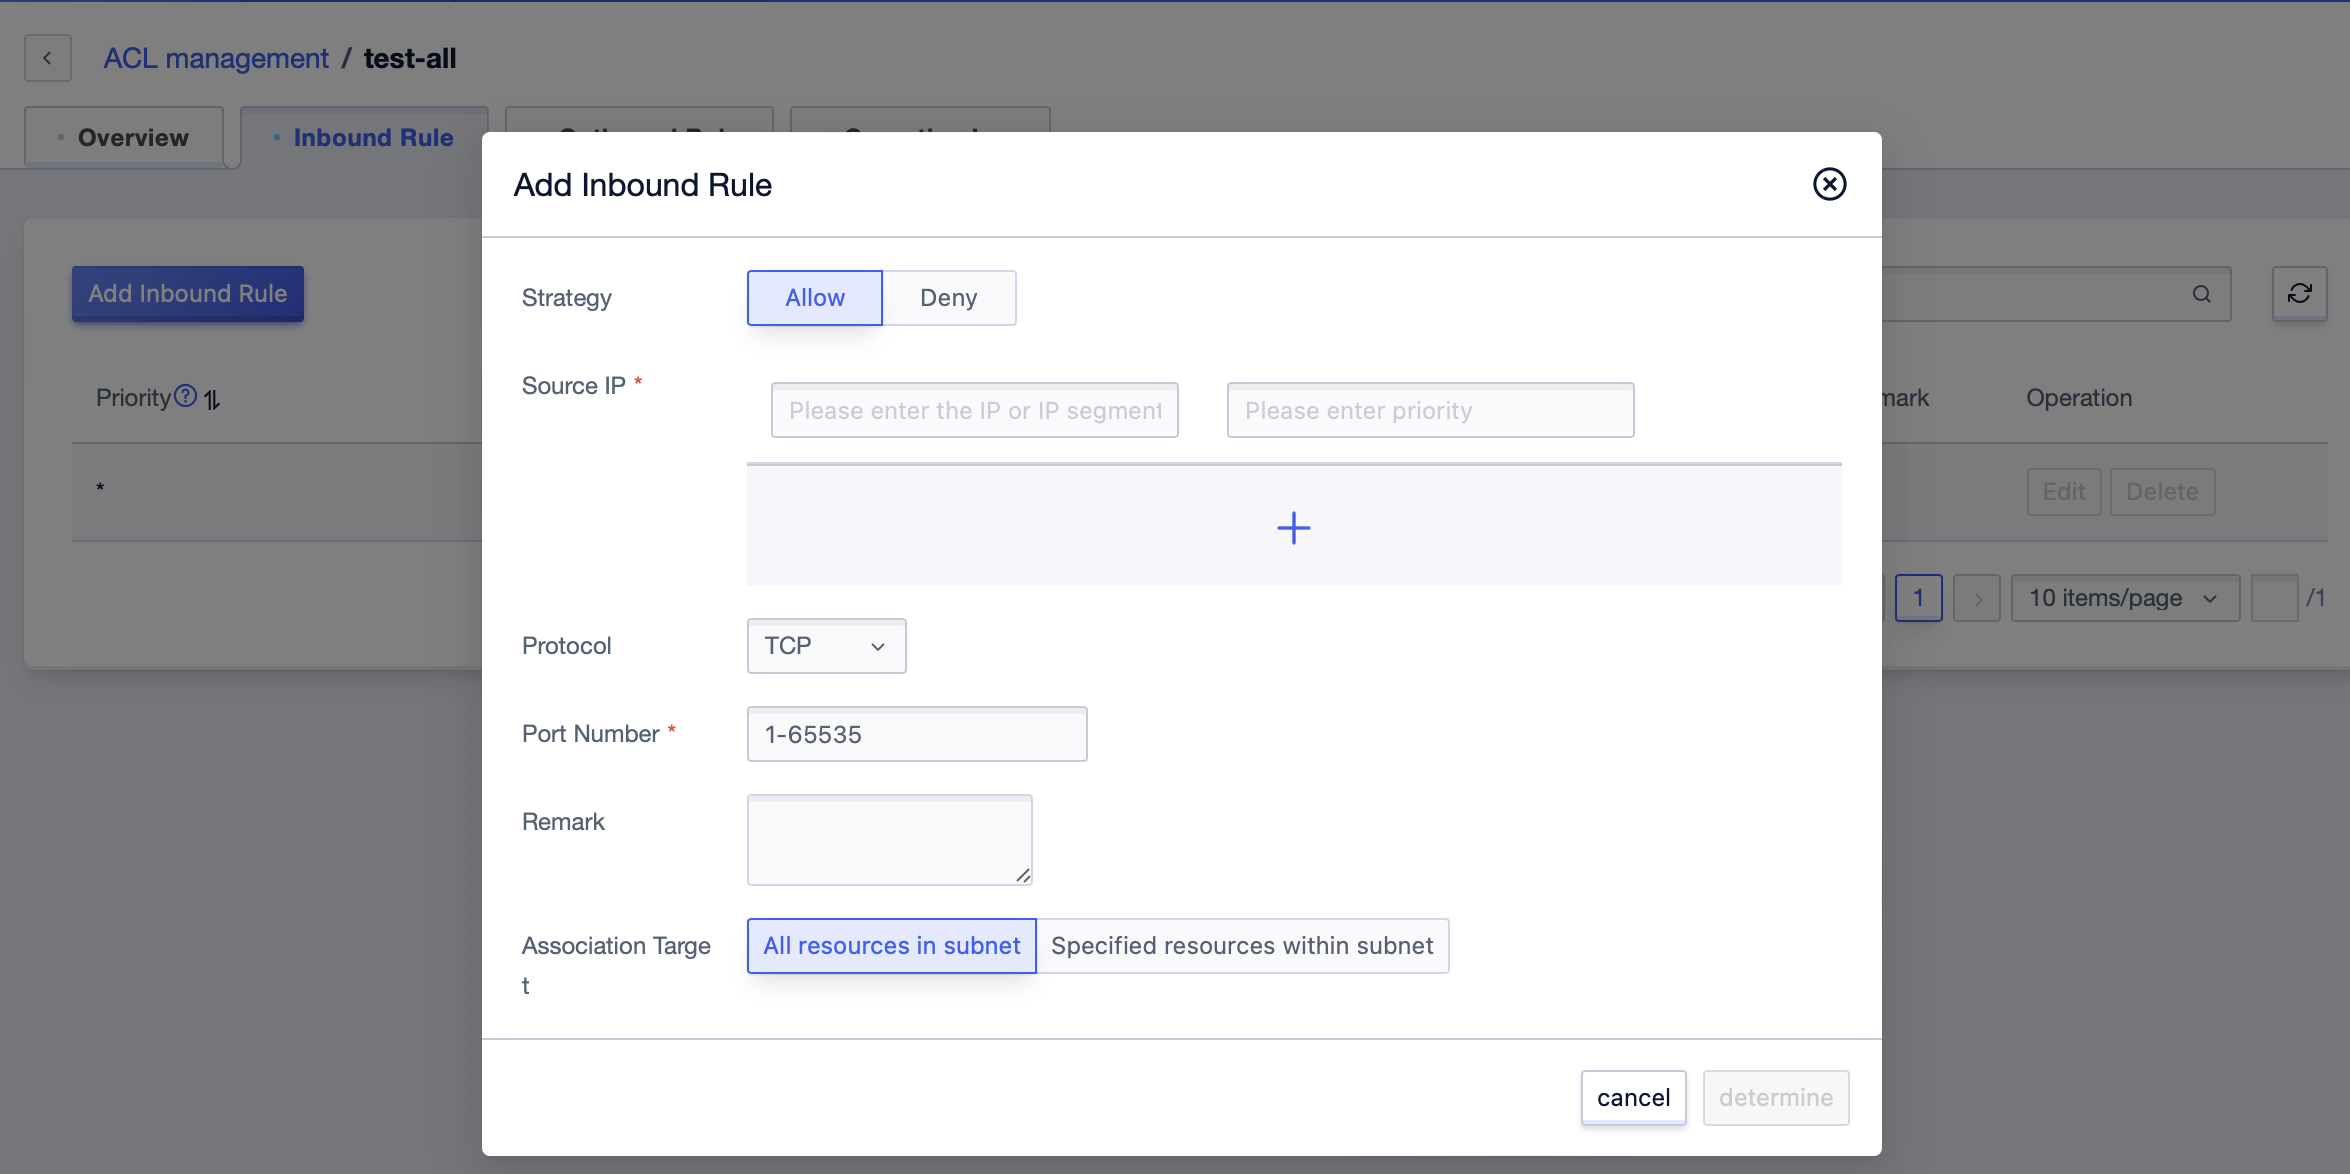
- In the details page, select the “Inbound Rule” tab. Click “Add Inbound Rule” to add inbound rules.
In the pop-up edit box, select strategy and protocol type, and fill in source IP, port and priority information. Click “OK” to add.
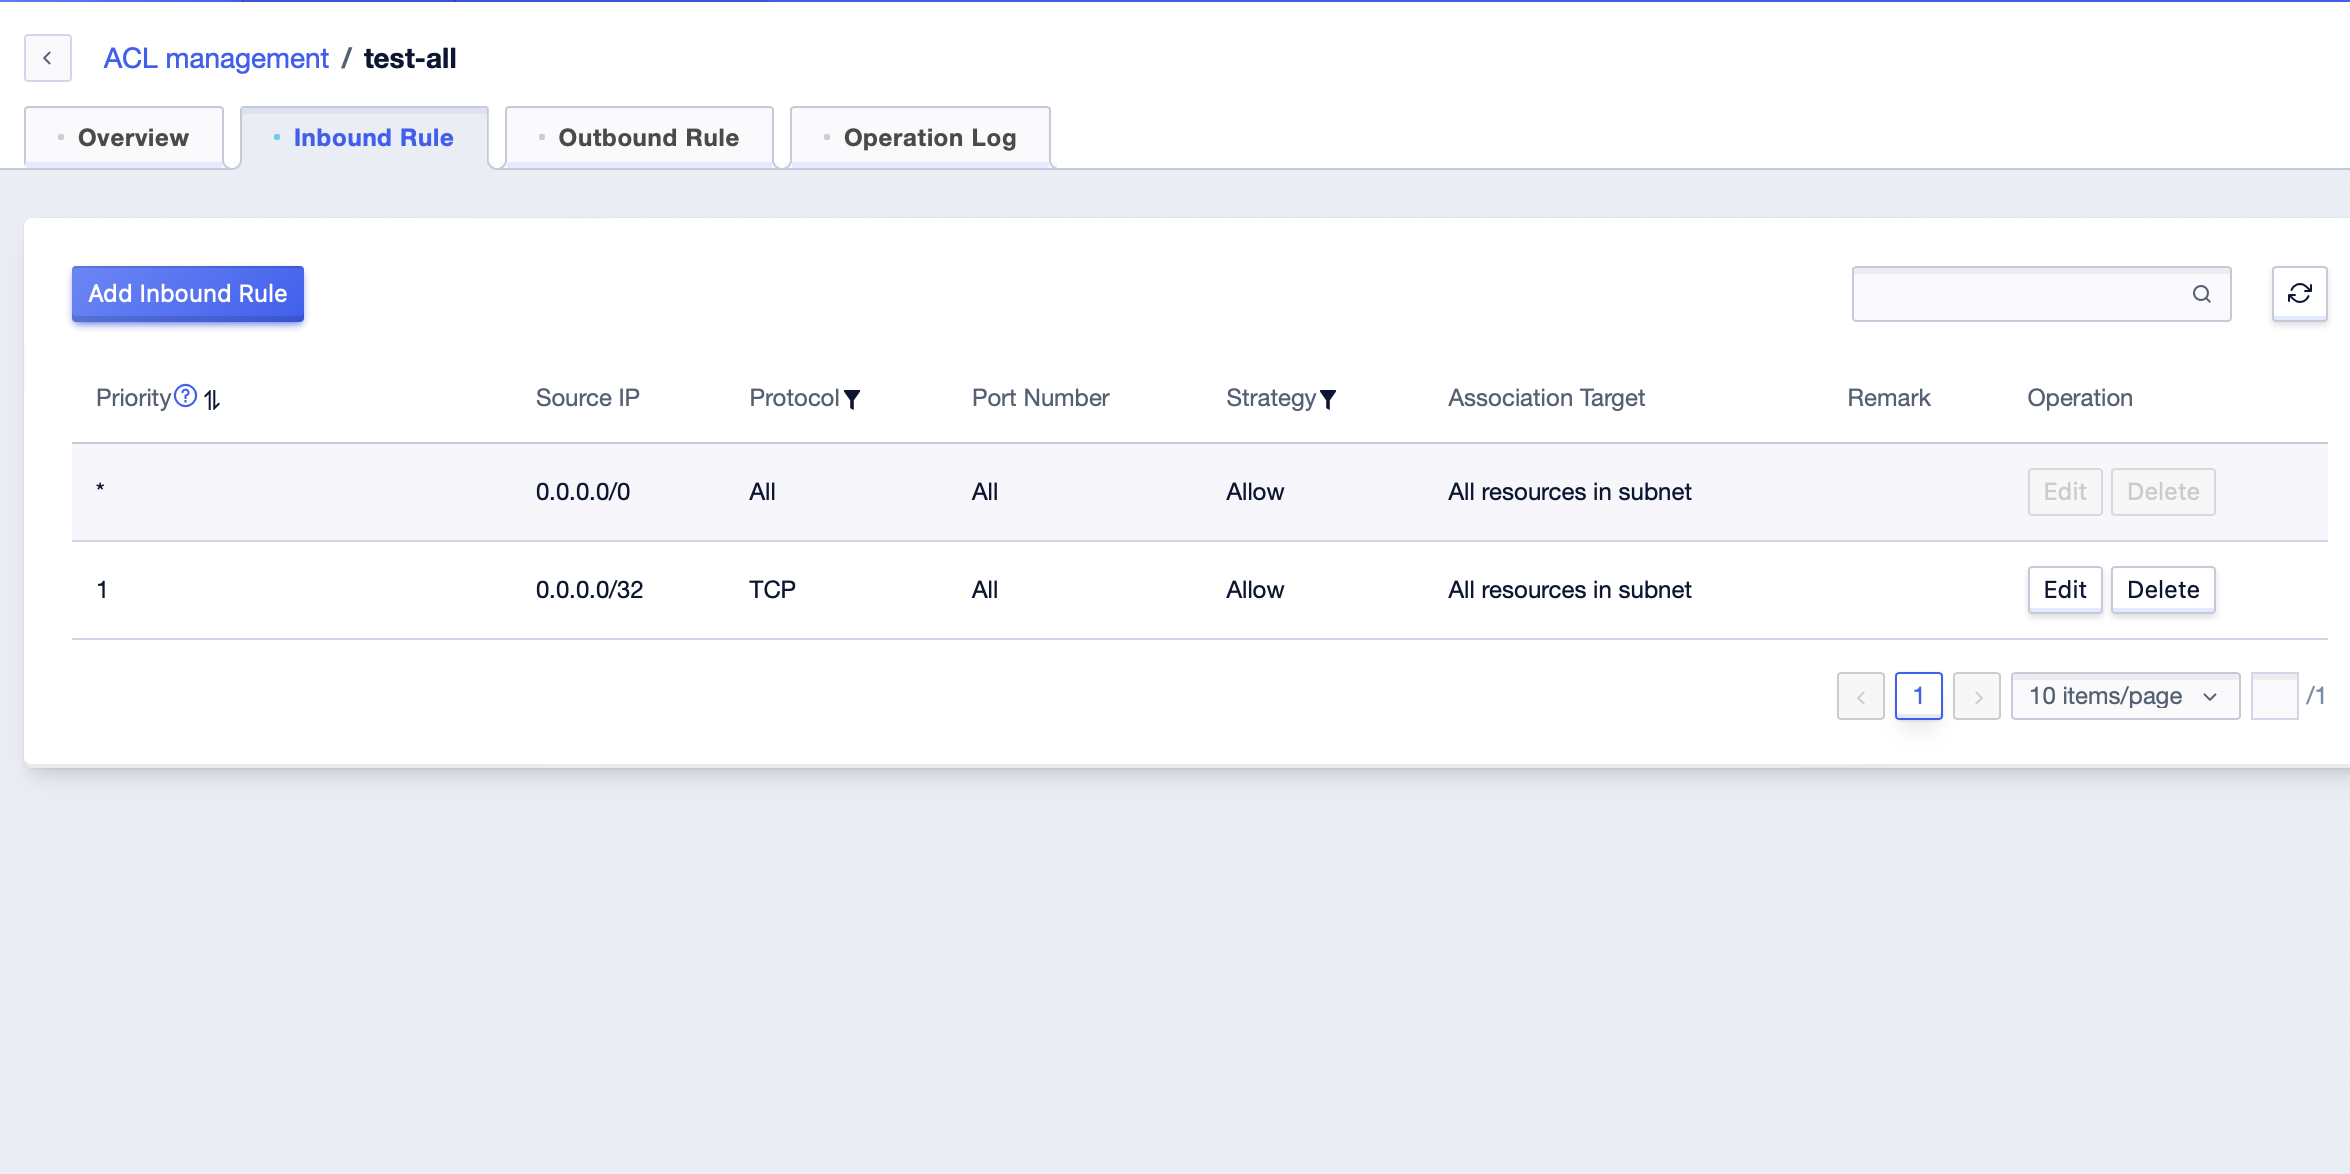
- After addition, you can edit and delete rules. The default rules are not allowed to be edited or deleted.
Edit outbound rules
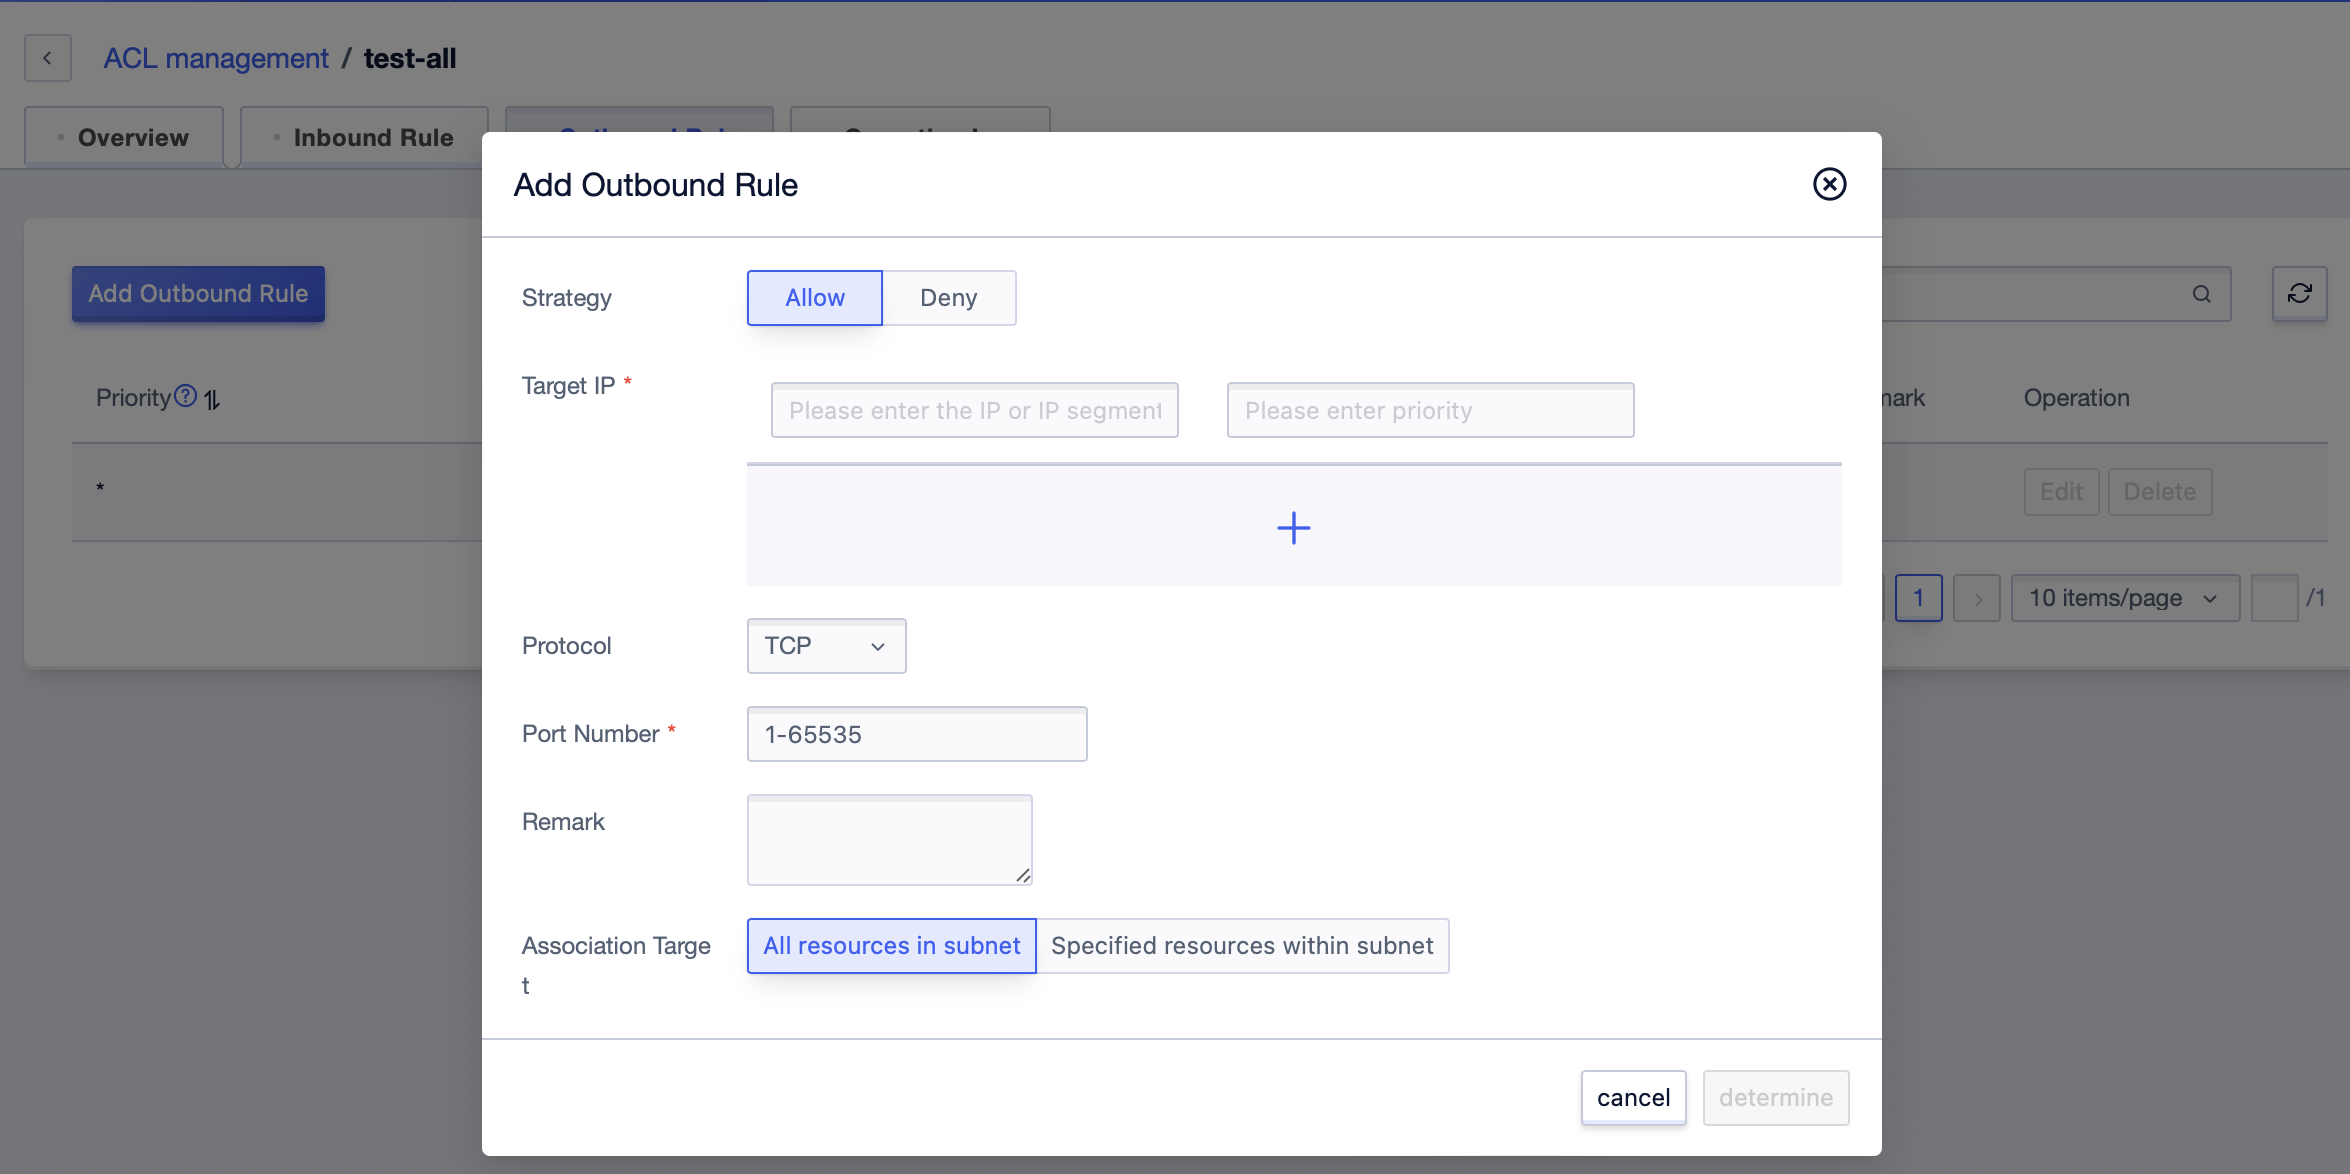
- In the details page, select the “Outbound Rules” tab. Click “Add Outbound Rule” to add outbound rules.
In the pop-up edit box, select strategy and protocol type, and fill in target IP, port, and priority information. Click “OK” to add.
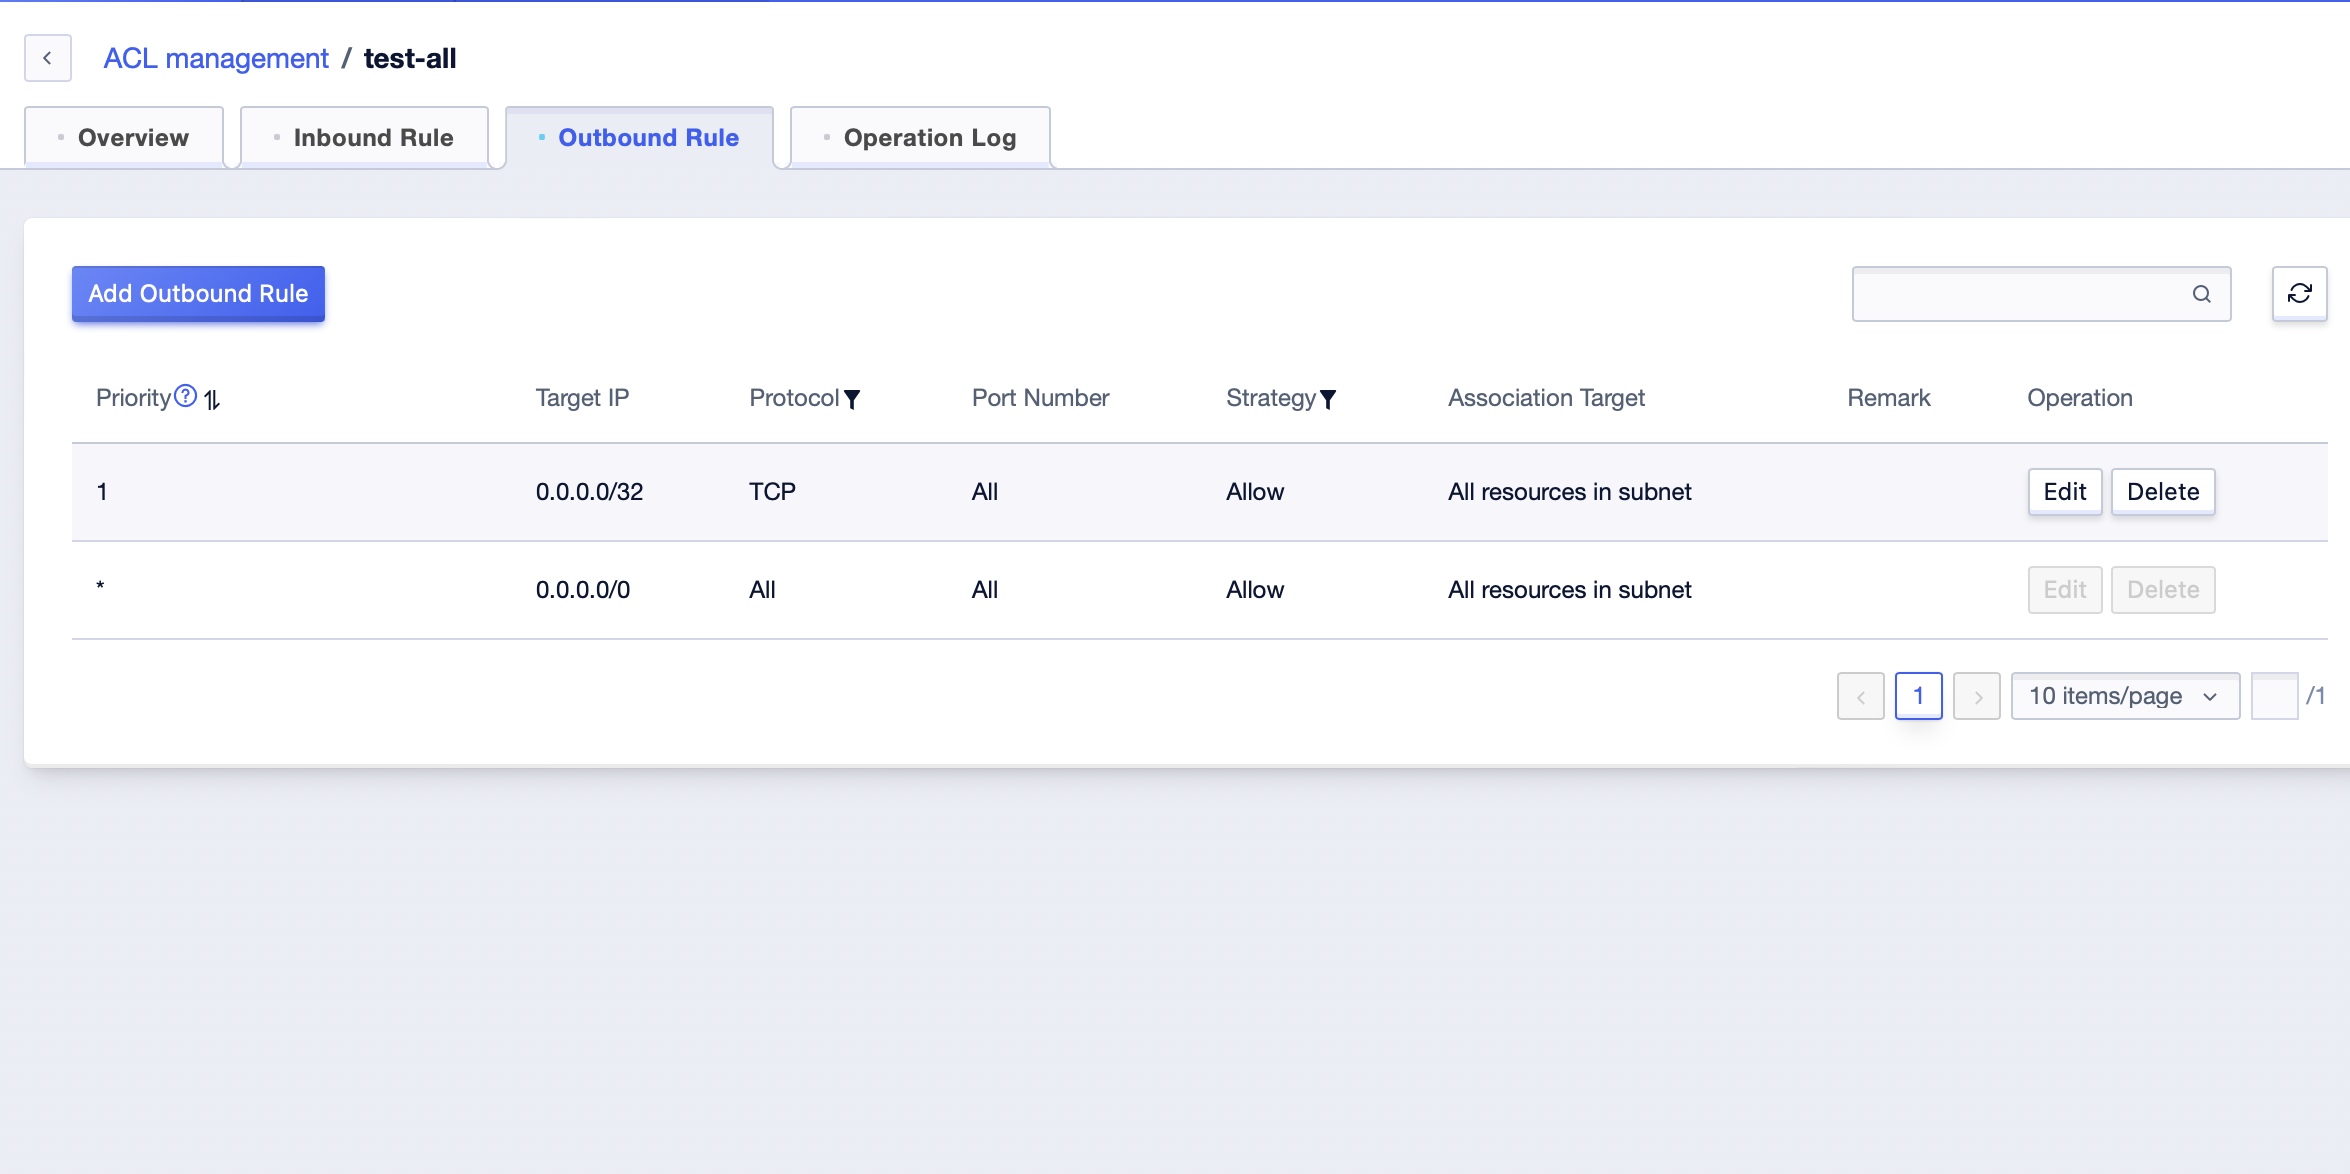
- After addition, you can edit and delete rules. The default rules are not allowed to be edited or deleted.
Associate subnets
After editing the rules, you can click “Details” to enter the ACL overview page. Click “Bind” to bind the ACL with the subnet under the associated VPC.
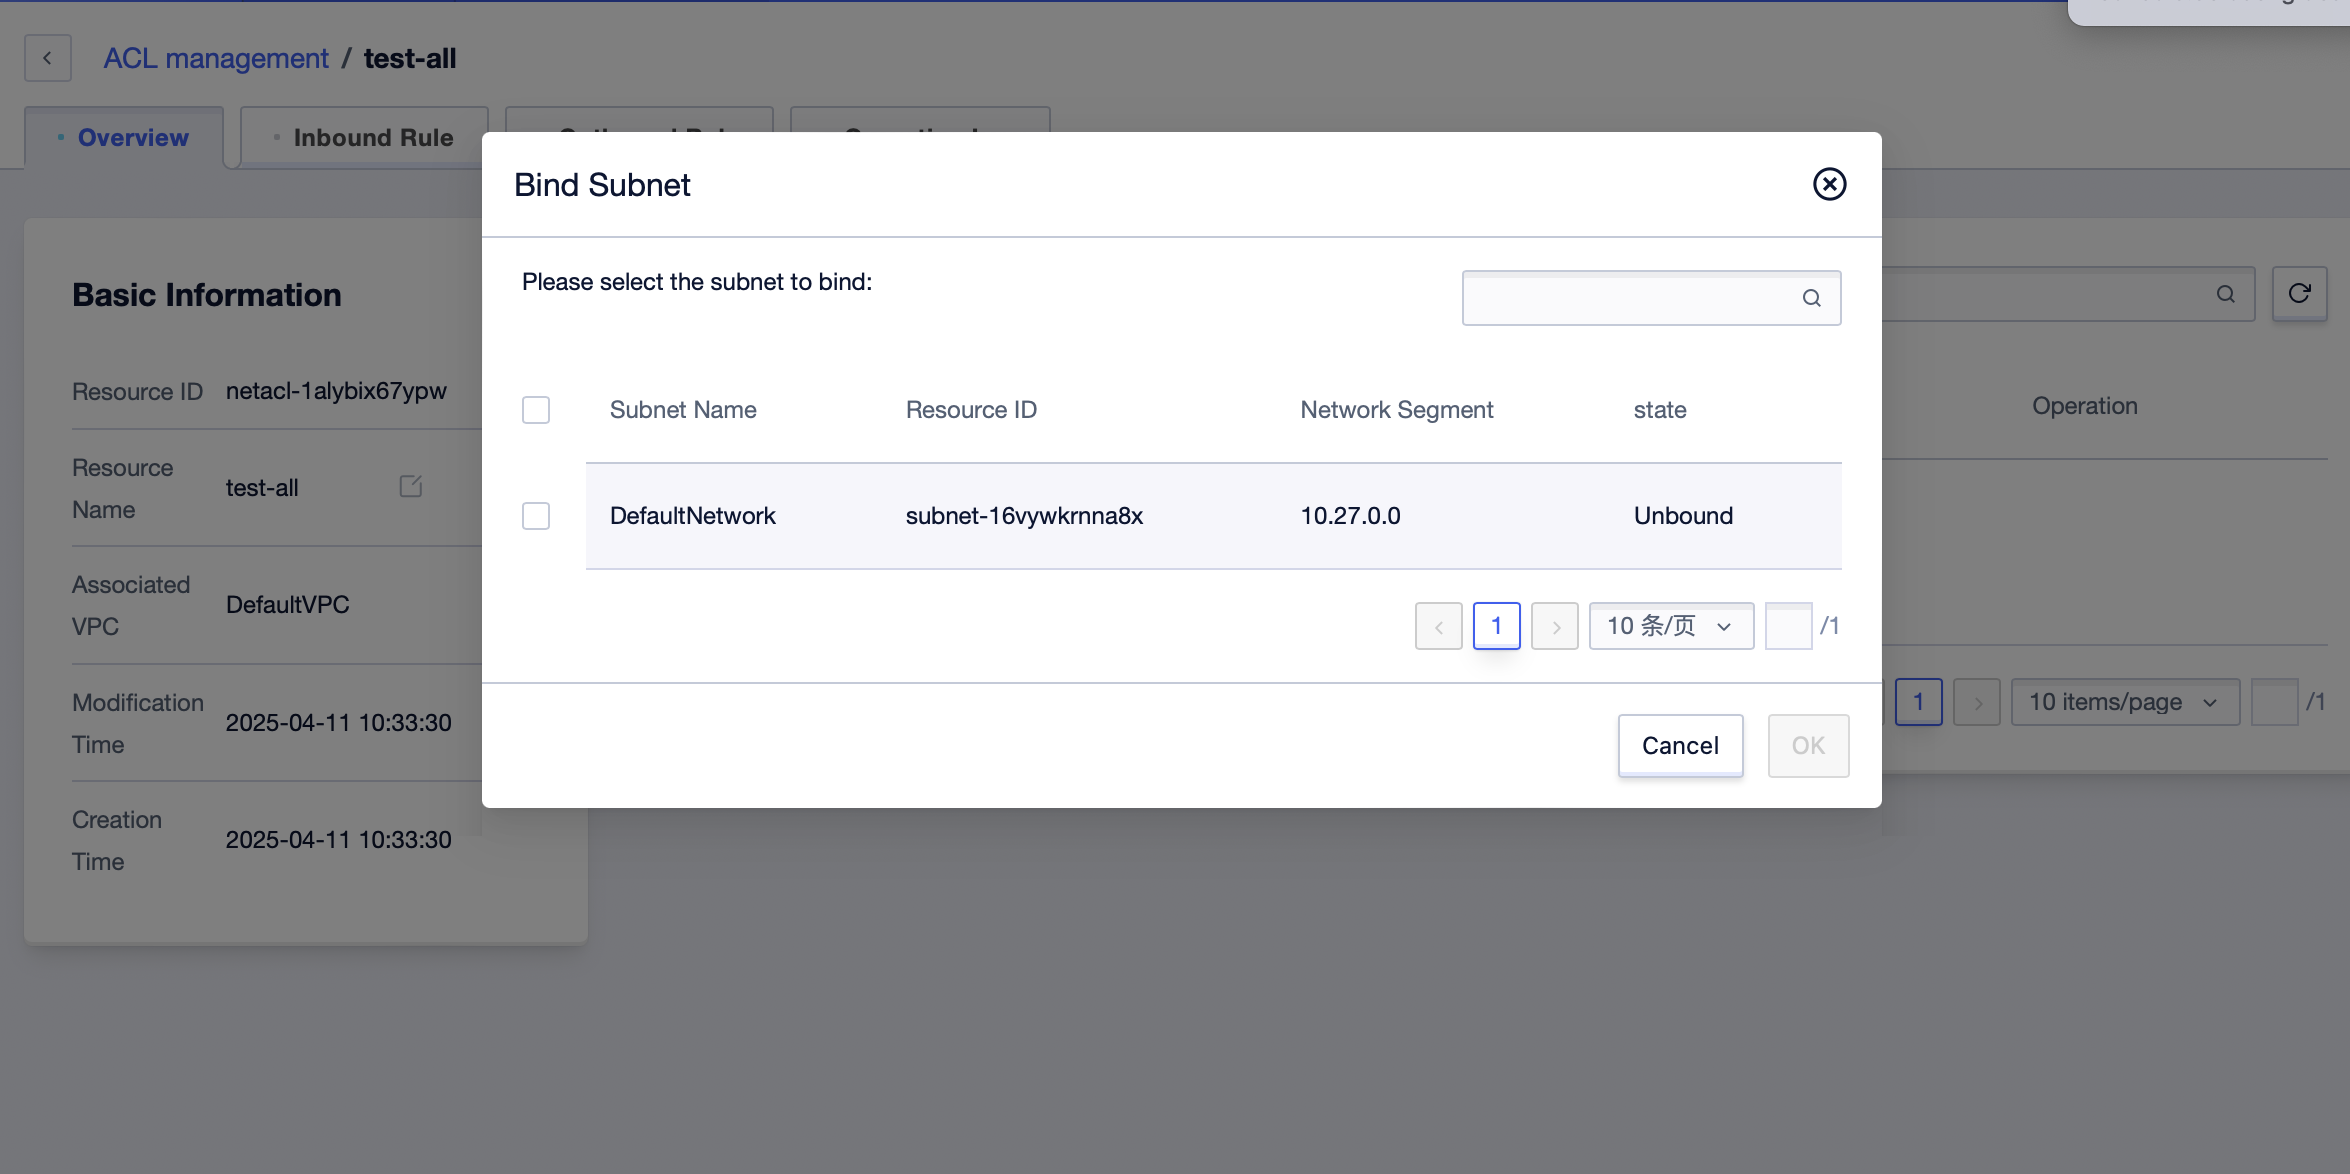
- Click “OK” to bind.
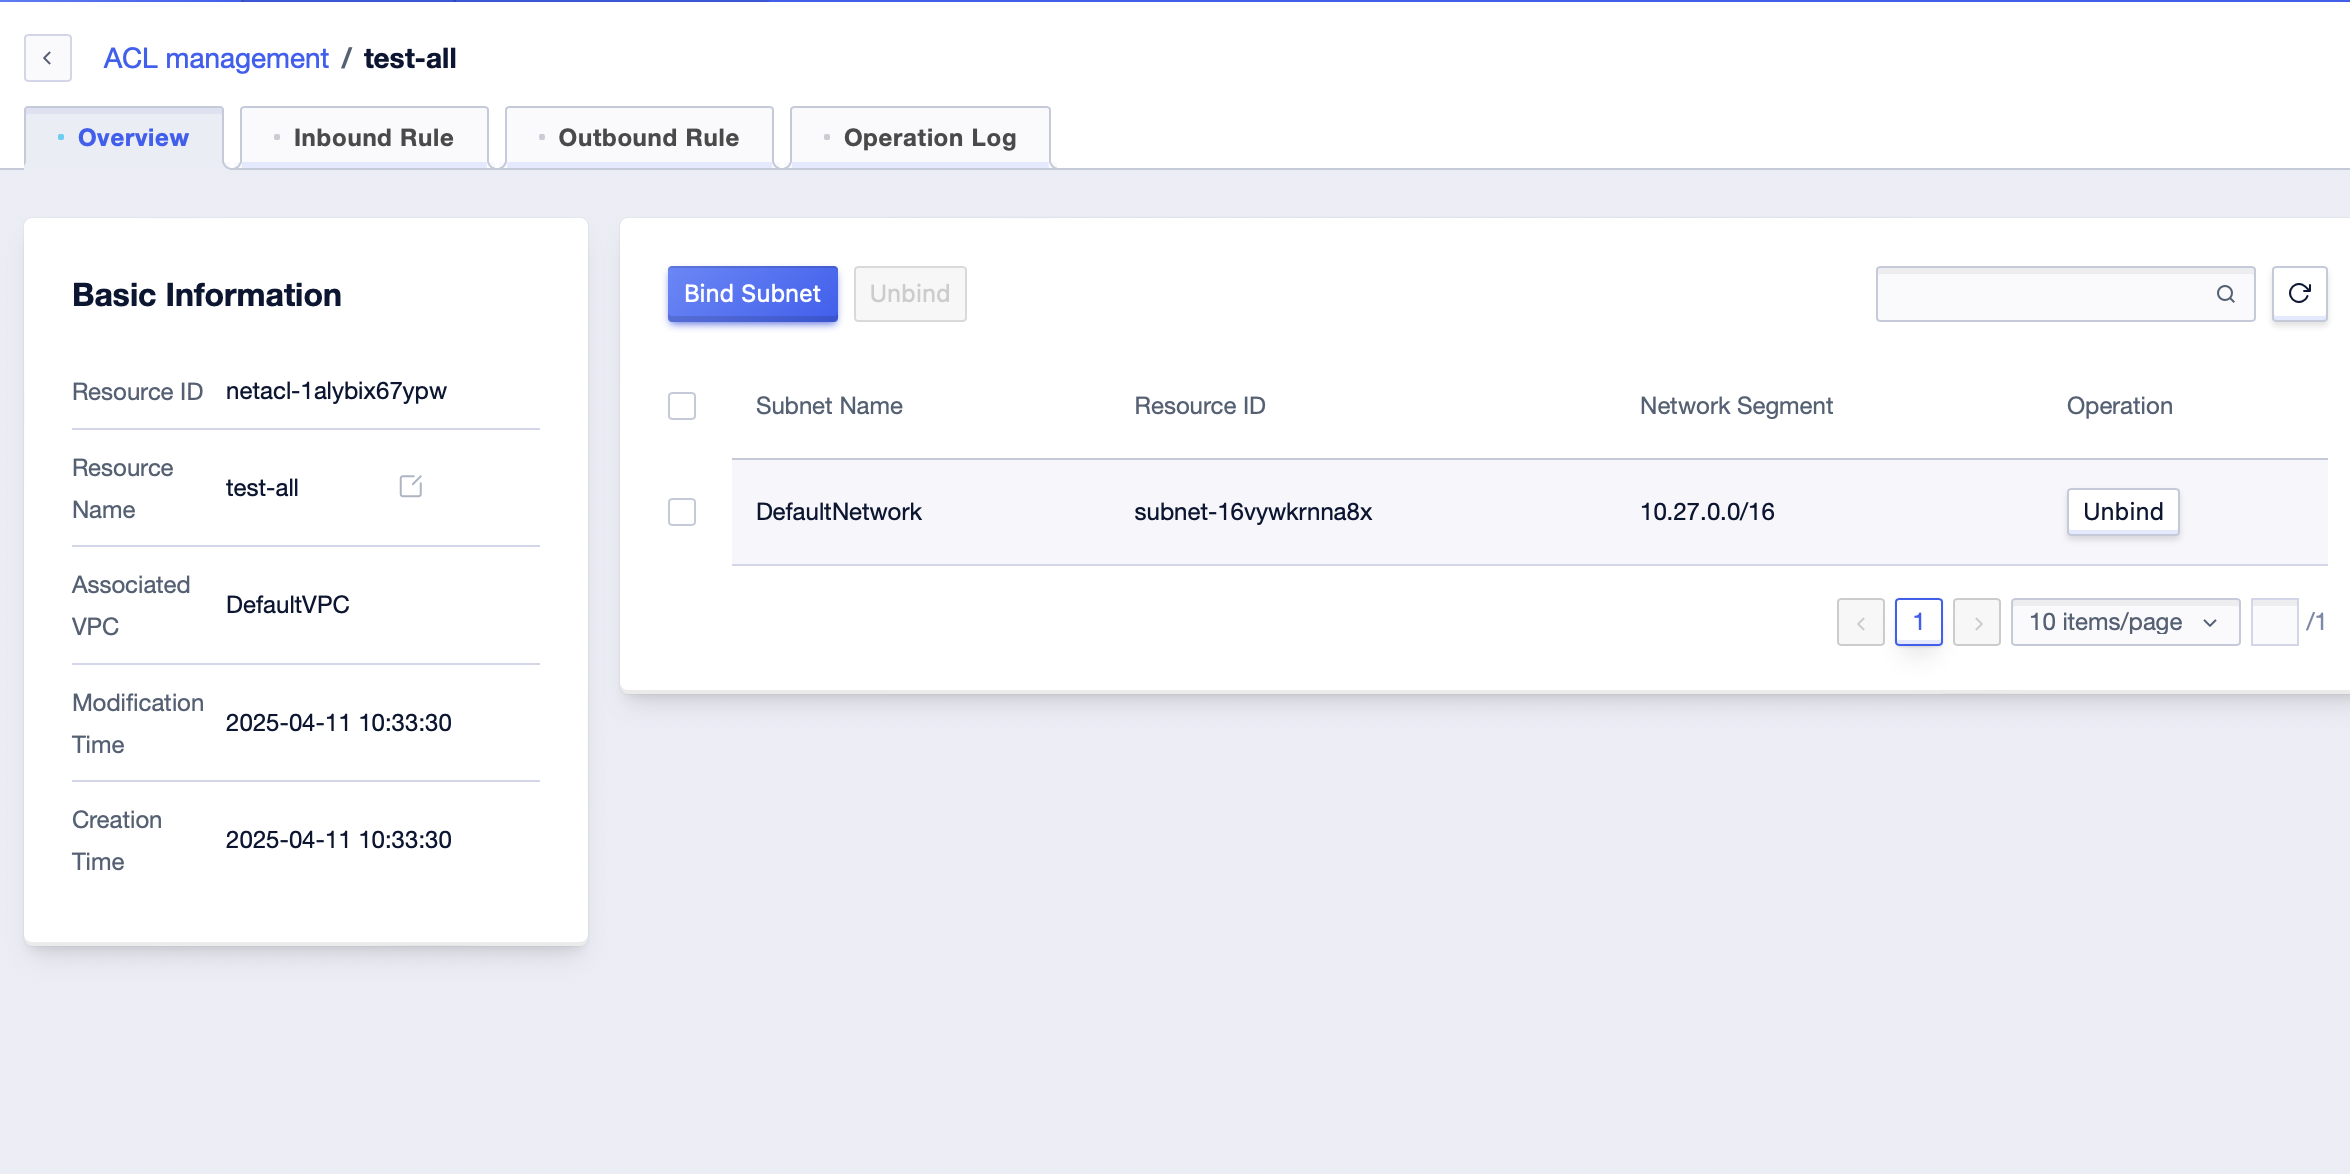
- Click “Unbind” to unbind the ACL and subnet. Batch unbinding operations can be performed.
