Kaniko & Jenkins
- Applicable cluster version 1.14~1.22
Introduction
In previous schemes, we introduced the Docker+Jenkins solution for container image building and business deployment, which requires the direct mounting of the docker socket file to the Jenkins slave container. Since the UK8S version 1.20 and later will adopt Containerd, this solution is no longer applicable.
In this article, we introduce the Kaniko+Jenkins CICD scheme. Kaniko is an open source tool developed by Google for building container images. Unlike docker, Kaniko does not depend on the Docker daemon process, it builds images line by line in the user space according to the content of Dockerfile. This allows images to be built in environments where the docker daemon process cannot be obtained, such as on a standard Kubernetes Cluster. About kaniko
I. Deploying Jenkins
1、 For ease of management, we deploy all the resources to be created in a namespace named jenkins, so we need to add and create a namespace:
kubectl create namespace jenkins2、 To dmeeclare a PVC object, we will mount the /var/jenkins_home directory of the Jenkins container to this PVC object later.
- Use SSD cloud disk as storage. Please deploy:
kubectl apply -f https://docs.ucloud-global.com/uk8s/yaml/cicd/yaml_jenkins_jenkins-pvc.yaml3、 Deploy the Jenkins master via Deployment. For the convenience of demonstration, we also expose it to the external network through a LoadBalancer-type service.
apiVersion: apps/v1
kind: Deployment
metadata:
  name: jenkins-deployment
  namespace: jenkins
spec:
  replicas: 1
  selector:
    matchLabels:
      app: jenkins
  template:
    metadata:
      labels:
        app: jenkins
    spec:
      securityContext:
        fsGroup: 1000
      containers:
      - name: jenkins
        image: uhub.ucloud-global.com/ucloud/jenkins:2.326
        env:
        - name: JENKINS_UC
          value: https://mirrors.tuna.tsinghua.edu.cn/jenkins/updates/
        - name: JENKINS_UC_DOWNLOAD
          value: https://mirrors.tuna.tsinghua.edu.cn/jenkins/
        ports:
        - containerPort: 8080
          name: web
          protocol: TCP
        - containerPort: 50000
          name: agent
          protocol: TCP
        volumeMounts:
        - name: jenkins-strorage
          mountPath: /var/jenkins_home
      volumes:
      - name: jenkins-strorage
        persistentVolumeClaim:
          claimName: jenkins-pvc-claim
---
apiVersion: v1
kind: Service
metadata:
  name: jenkins
  namespace: jenkins
  labels:
    app: jenkins
spec:
  type: LoadBalancer
  ports:
    - name: web
      port: 8080
      targetPort: web
    - name: agent
      port: 50000
      targetPort: agent
  selector:
    app: jenkins
4、 After the service starts successfully, we can access the jenkins service according to the IP of LoadBalancer (i.e., EXTERNAL-IP), and install and configure according to the prompt information.
bash-4.4# kubectl get svc -n jenkins
NAME      TYPE           CLUSTER-IP       EXTERNAL-IP    PORT                        AGE
jenkins   LoadBalancer   172.17.201.210   106.75.98.80   8080:33651/TCP,50000:43748/TCP   4d21h
III. Install Kubernetes Plugins
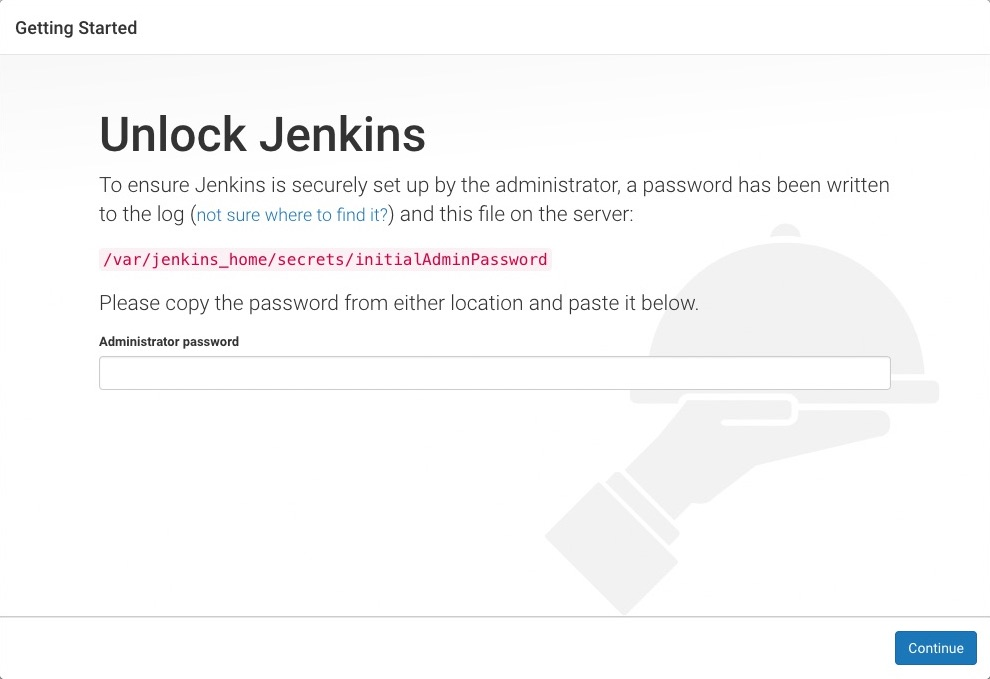
1、 We have already got the public IP address of Jenkins, we directly enter EXTERNAL-IP:8080 in the browser to open the Jenkins page, prompting to enter the initialization password:

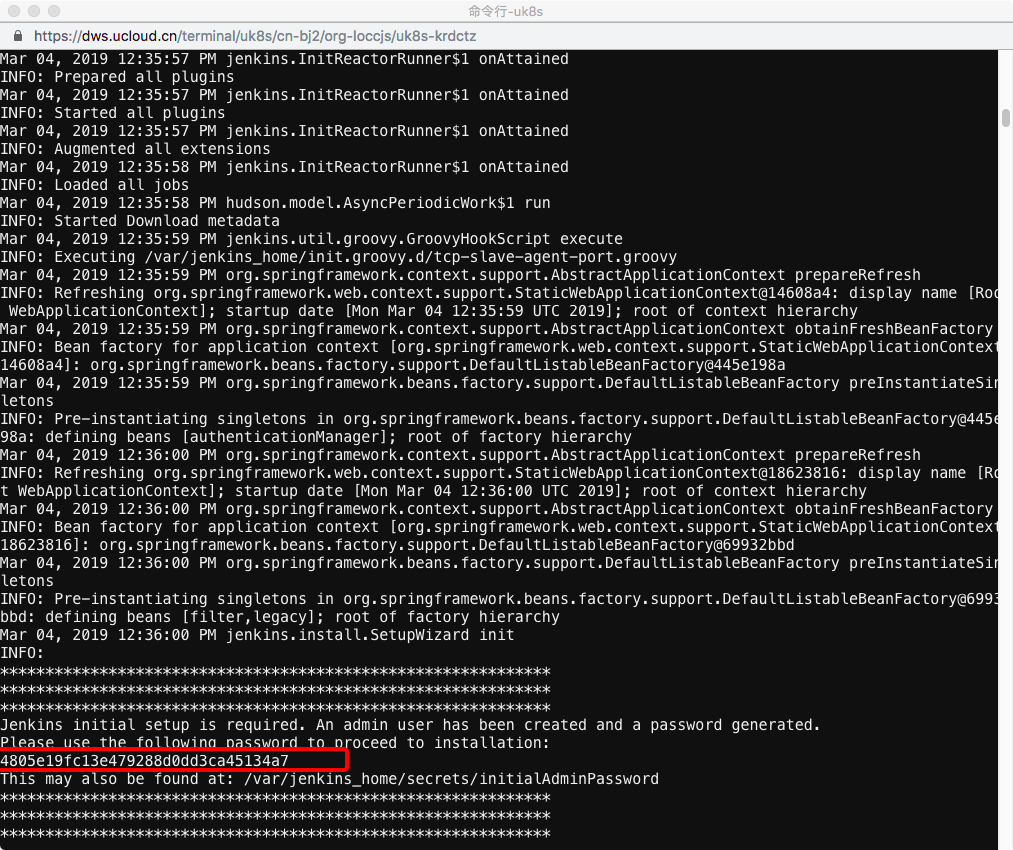
2、 We get the log of the Jenkins container through kubectl log to get the initialization password
kubectl -n jenkins get pod

kubectl -n jenkins logs jenkins-deployment-xxxxxxx
3、 Enter the plugin installation page, before the configuration, first enable proxy compatibility, access http://exter-ip:8080/configureSecurity/ , and check
Enable proxy compatibility. This step may encounter an error, so just try a few more times.
4、 Select recommended installation. After installation, add administrator account to enter the jenkins main interface.
5、 Next install the jenkins dependent plugin list - kubernets plugin, so that it can dynamically generate the Slave Pod. Click Manage Jenkins -> Manage Plugins -> Available -> Kubernetes plugin to install.

Installing plugins is relatively slow, please be patient. As it is online installation, the cluster needs to open the external network. Please turn on natgw to make the node node connect to the external network.
IV. Configure Jenkins
The next step is the most important one. After the Kubernetes plugin is installed, we need to configure Jenkins and Kubernetes parameters, allowing Jenkins to connect to UK8S clusters and call Kubernetes API to dynamically create Jenkins Slave and execute build tasks.
First, click Manage Jenkins —> Configure System to enter the system settings page. Scroll to the bottom of the page, and then click Add a new cloud —> select Kubernetes to start filling out Information on Kubernetes and Jenkins configurations.
1、 Enter UK8S Apiserver address, and service certificate key.
The information for these two parameters can be obtained from the Intranet Credentials on the UK8S Cluster Details page. The “service certificate key” is the certificate-authority-data field content in the cluster certificate, decoded with base64, and the decrypted content is copied to the input box.
2、 Fill in the cluster Namespace, upload the credentials, and Jenkins address
- The Namespace here should be filled in with the Namespace created earlier, and here it is jenkins.
- For credentials, click “Add”, select the credential type “Secret file”, copy the content of Intranet Certificate from the UK8S cluster details page and save it as kubeconfig and upload.
- Jenkins address is
kubectl -n jenkins get svcto get the address.
3、 Click “Connect Test”, if there is a prompt of Connection test successful, it means that Jenkins can communicate with the Kubernetes system normally.
V. Configure credentials for kaniko
Create a credential for kaniko to push the image to uhub, find a cloud host with docker installed, and login to uhub once:
docker login uhub.ucloud-global.com -u user@ucloud-global.comAfter successful login, a config.json file will be generated. Use this file to create a secret for the kaniko container.
- The file location in the centos environment:
/root/.docker/config.json - File location in the Ubuntu environment:
/home/ubuntu/.docker/config.json
Copy config.json to the root directory of the master node and execute the command to create the secret
kubectl -n jenkins create secret generic regcred --from-file=config.jsonThe configuration is finished here.
VI. Create a Job
The configuration work of the Kubernetes plugin is completed. Next, we will add a Job task to see if it can be executed in the Slave Pod, and check if the Pod will be destroyed after the task execution.
For ease of use, we provide a ci/cd of a golang project jenkins-kaniko-cicd which contains the complete compilation, image building, and deployment process. The configuration information about Slave Pod and CICD in the original scheme is all configured in the Jenkinsfile, and you can change the Jenkinsfile file according to the project’s own needs.
1、 On the Jenkins homepage, click create new jobs, create a test task, enter the task name, then we select the “pipeline” type task, and click OK.
2、 On the task configuration page, and here we choose GitHub project and enter the task address of kaniko.
3、 In the pipeline area of the task configuration page, select Pipeline script from SCM, and select the Master branch and the path of the Jenkinsfile file.